How to Create a Liquid Edition on Bullet
And... WTF is a Liquid Edition?
I recently wrote about the work we've been doing on Avalanche with regard to 404s.
A quick TLDR on 404s:
They are a combination of ERC20 tokens and ERC721 tokens–essentially an NFT that has liquidity and can be traded on a DEX (just like a meme coin or other token).
When you get a certain number of tokens, an NFT is automatically minted into your wallet. If you drop below a certain number, an NFT is burned.
Liquid Editions
We built out a 404-deployment system on Bullet to make it easier to do things like we did with the launch of Kingshit.
In the process, we realized this could also be a really interesting way to launch editions. You can create a single piece of art and use it to create a tradable token with actual liquidity.
A few potential benefits:
- Earn fully-enforced, on-chain royalties as long as your artwork is traded
- Liquidity increases the velocity of trading (can be good for speculators and collectors + you earn more fees)
- Potential for funds to actually collect your work since they can sell fractions
How to Deploy a Liquid Edition
Let's get to the main part of this. I'm sure I'll write more articles about 404s and what I think are their benefits later.
Bullet
To get started, head over to https://bullet.exchange. It's a 404 trading platform that I'm building on Avalanche.
To use Bullet, you'll need a wallet like Metamask or Core, and you'll need a bit of AVAX.
Deploying these contracts will leave you with a fairly complex smart contract that you are the owner of, and it'll currently cost you about $4 (0.14 to 0.16 AVAX) to complete all of the configuration.
To get started with the deploy, click "Launch" in the top menu.
Token Details
This page will have 4 forms. That's 4 separate steps, and you need to complete them in order. Depending on when you read this, the design may look a bit different, but the flow should be the same.
The first thing you need to do is set the token details in the first form on step 1.
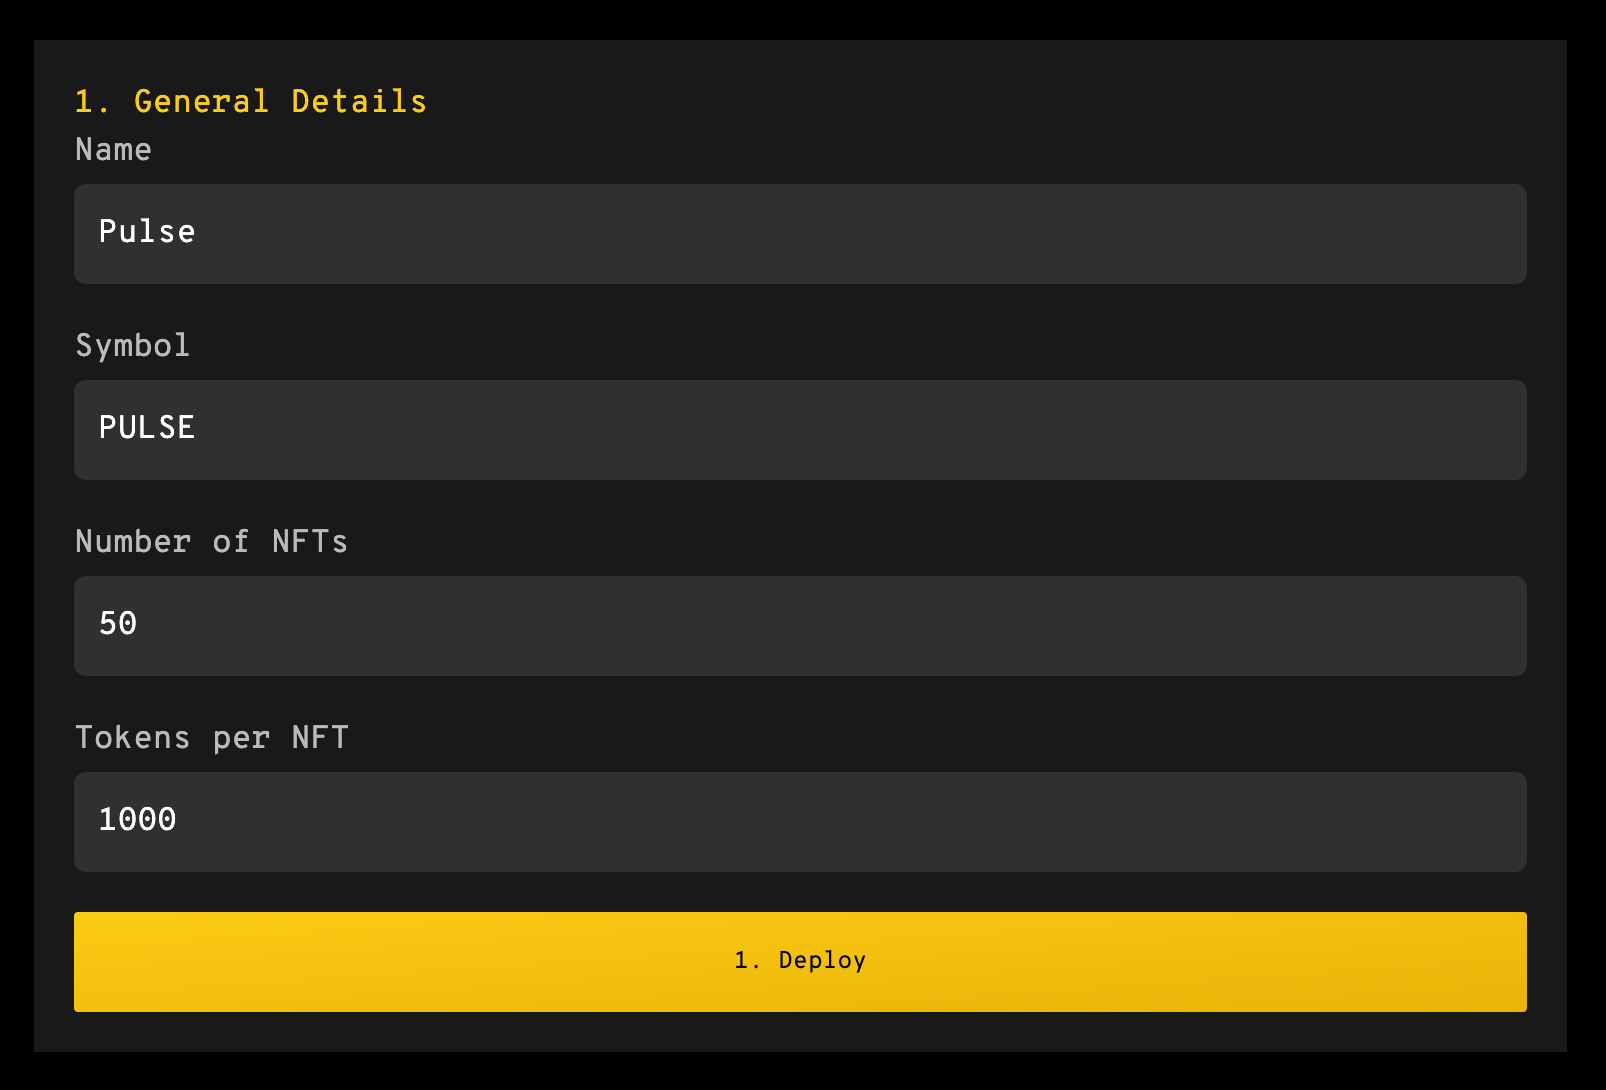
Name and symbol are typical things you are probably familiar with if you've traded any tokens or created NFTs in the past.
The number of NFTs is the total number of editions you are creating. Due to how liquidity works, the minimum number we allow is 50. With 50, each NFT is 2% of the token supply.
The tokens per NFT field is how many tokens a person must collect to have a full NFT minted into their wallet.
In this case above, there will be 50,000 total tokens, and a person must collect 1,000 to get an NFT.
This step has been costing me about 0.07 to 0.08 AVAX because it's deploying quite a lot of code for you.
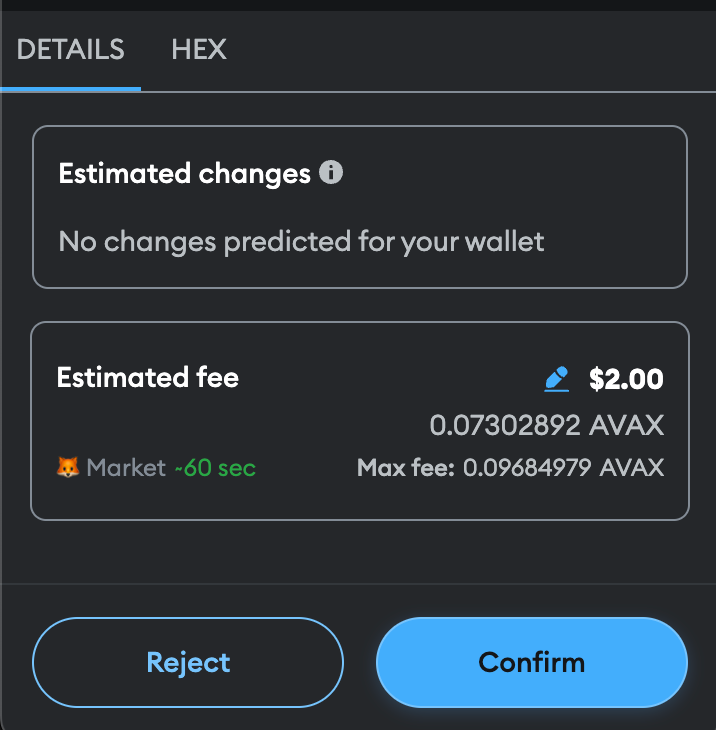
We will work on optimizing these in the future.
Content Details
Next, we're going to actually set up the artwork.
First, we ask for your royalty address, which is normally just whatever wallet you are using to deploy.
Once you click "yes" on the Is Edition? field, an image selector will appear. You must add an image and description. Then you can click the "upload" button.
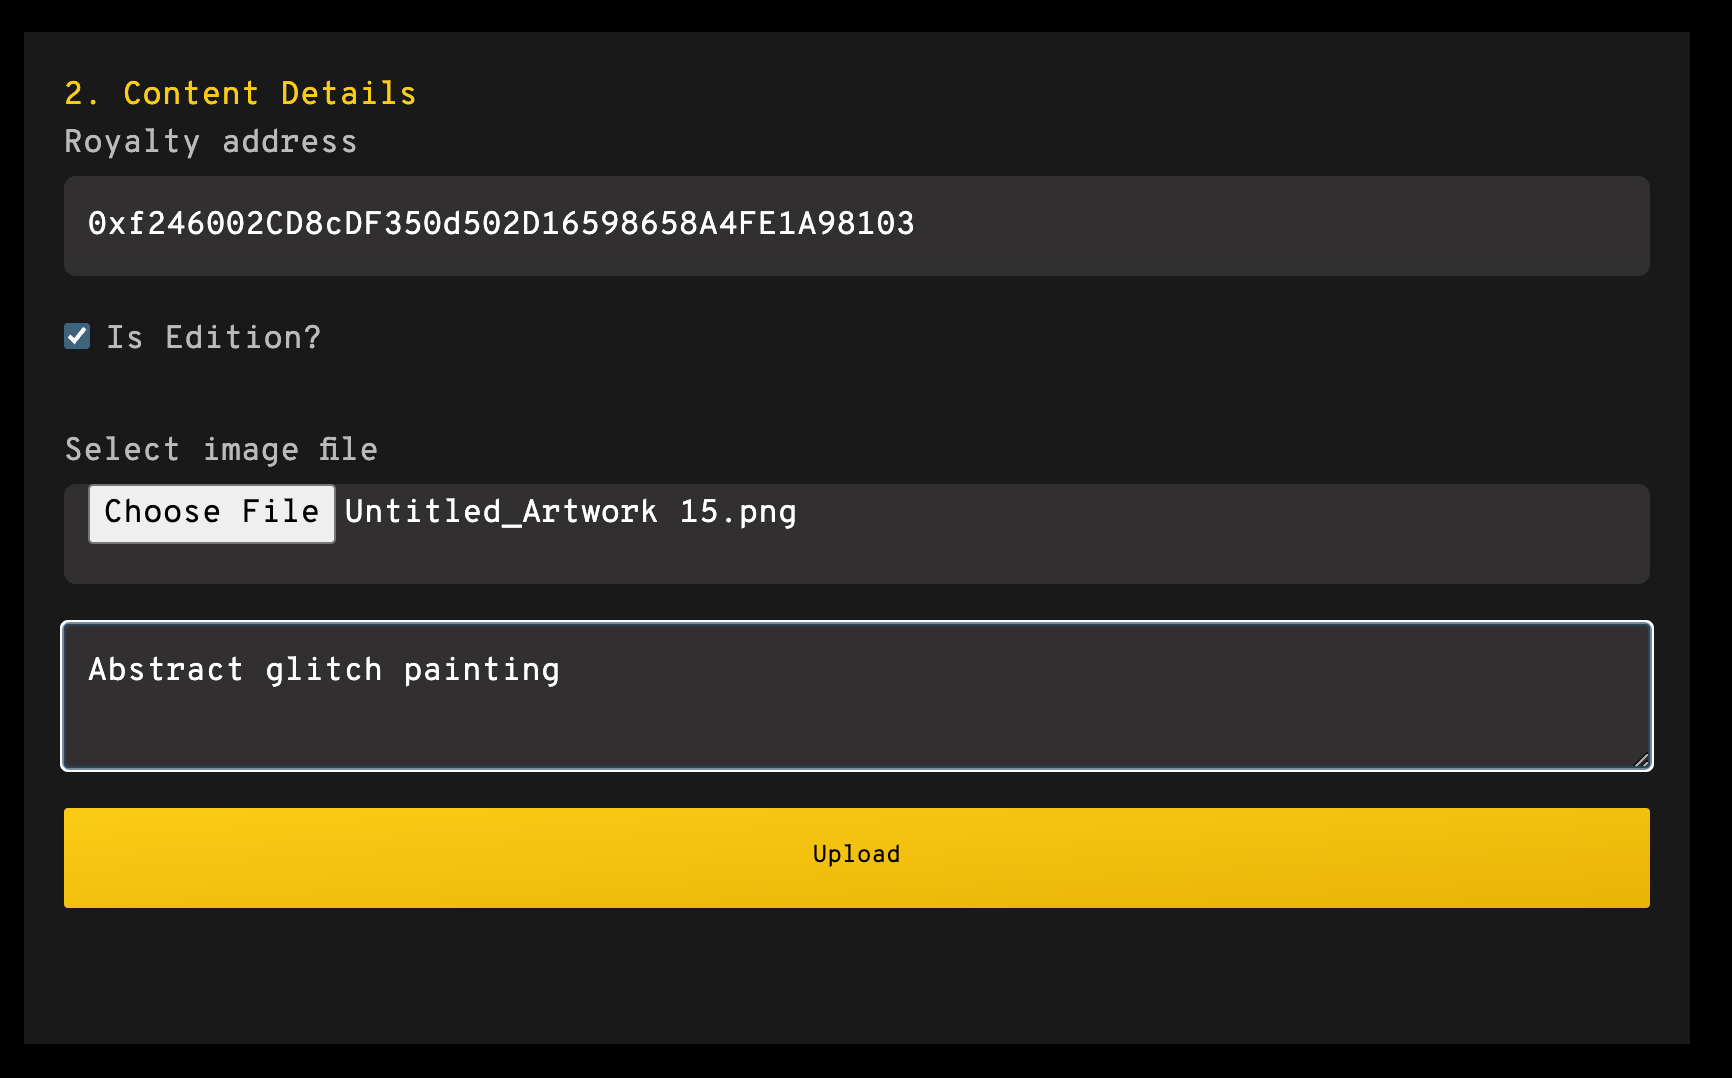
The artwork may take a little while to upload depending on how large it is.
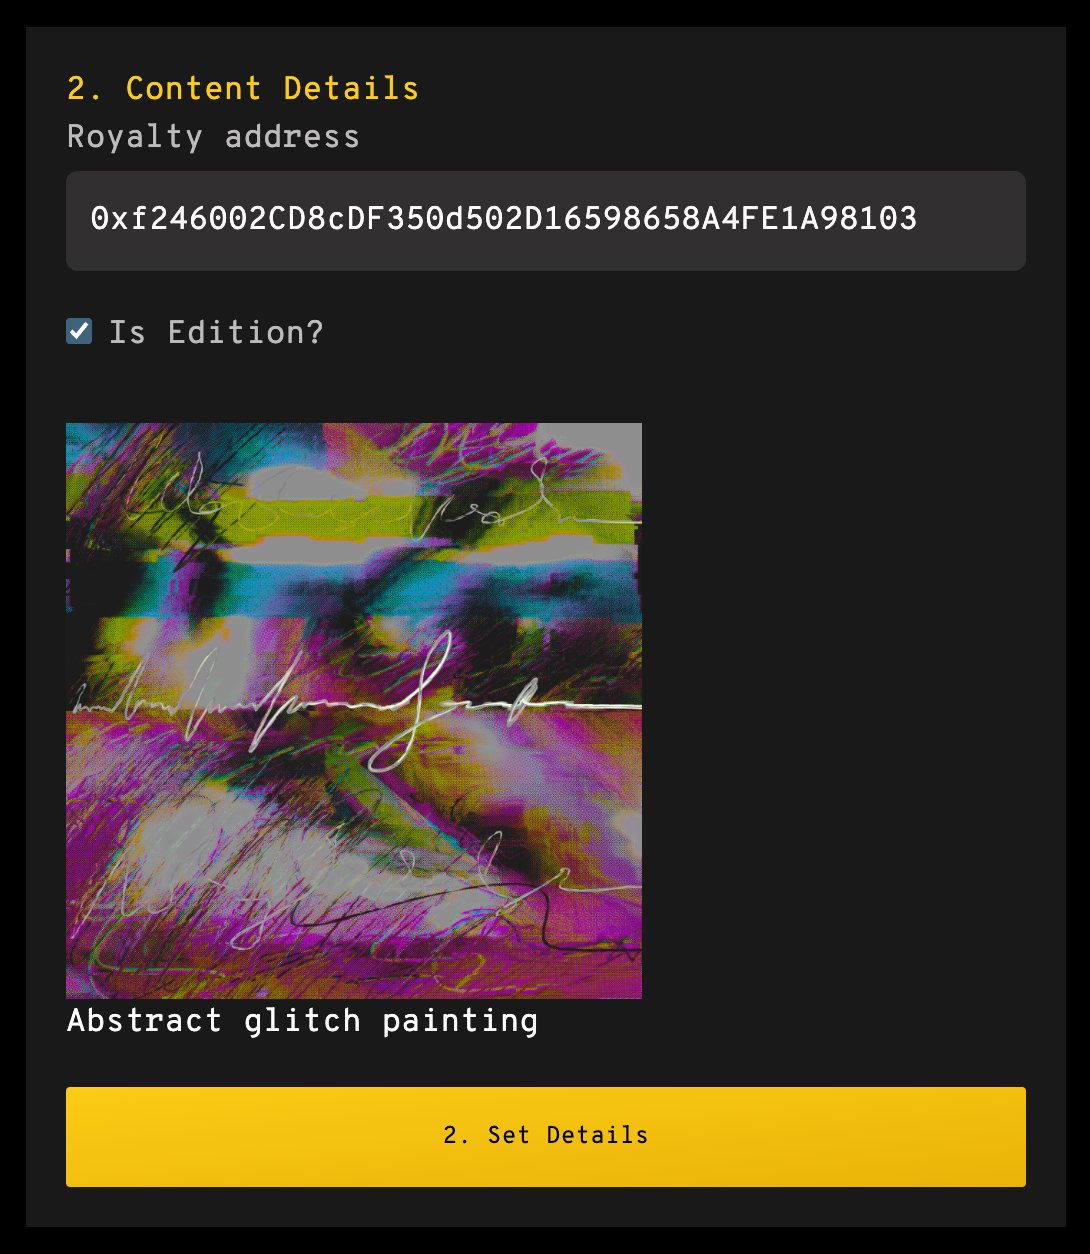
Once it's finished, you should see something like this.
IMPORTANT
At this point, you need to click "Set Details".
This will trigger another transaction that actually creates the metadata for your piece on the contract.
If you miss this, it's fixable later, but it's better not to miss it 😅
I will update the UX asap, but for now, just click the button 👍
Configure Reserves
This step will probably be the most confusing to everyone, so I'll try my best to explain how it works in detail.
As the creator, you get to choose two things:
- How many pieces to keep for yourself
- How much of the mint funds you receive
If you've minted on other platforms, you might be thinking "Wait, don't I get ALL of the mint funds???"
Well... no.
In order to create liquidity, we have to pair a portion of the funds generated at mint with and put it into LP on a DEX.
We're actually taking some or all of the funds and burning them to create permanent liquidity on LFJ (formerly Trader Joe).
You can choose to have up to 50% of mint funds flow to you.
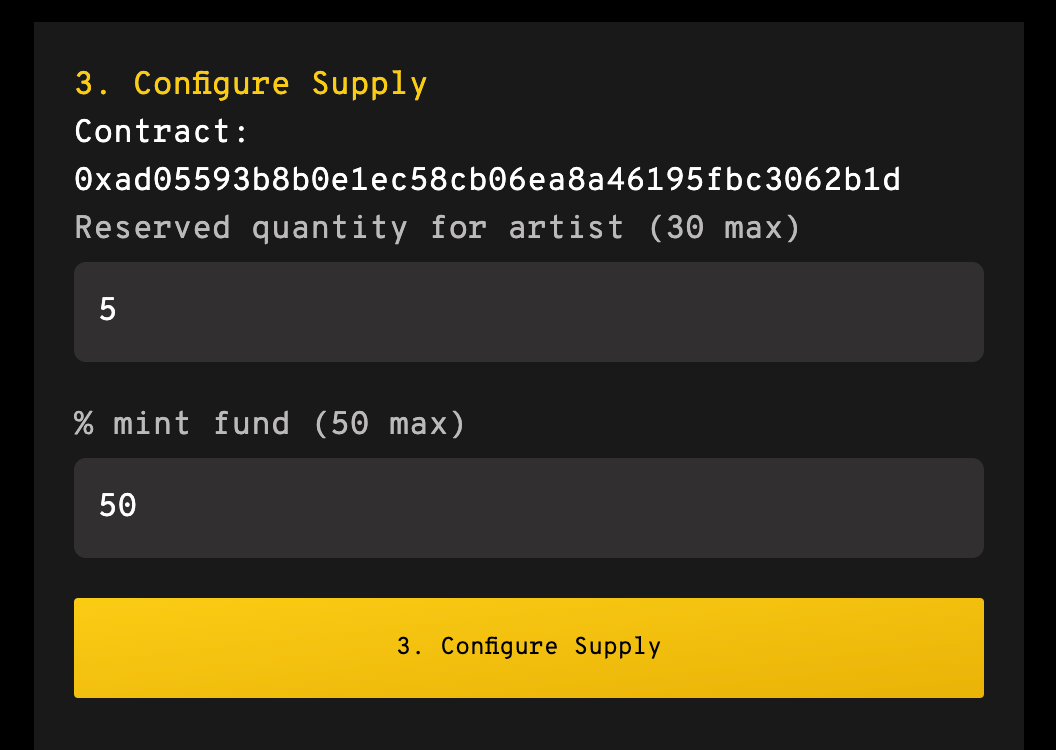
Here, I'm reserving 5 items for myself (10% of the supply), and I'm keeping half of the funds generated on mint.
There's some decently complicated math behind figuring out how many items should be paired with LP and so on, and I'll save that explanation for later.
For the moment, just realize that:
- It does work
- Some of the numbers may surprise you if you do the math after a mint
I'm going to build a calculator that shows you how many you should mint at what price in order to generate a certain amount of mint funds + LP, but for now, it may be slightly confusing.
This step will also be around 0.07 AVAX at the moment. It's deploying a number of things including a liquidity pool on LFJ.
Configuring the Mint
The last step is mostly straightforward.
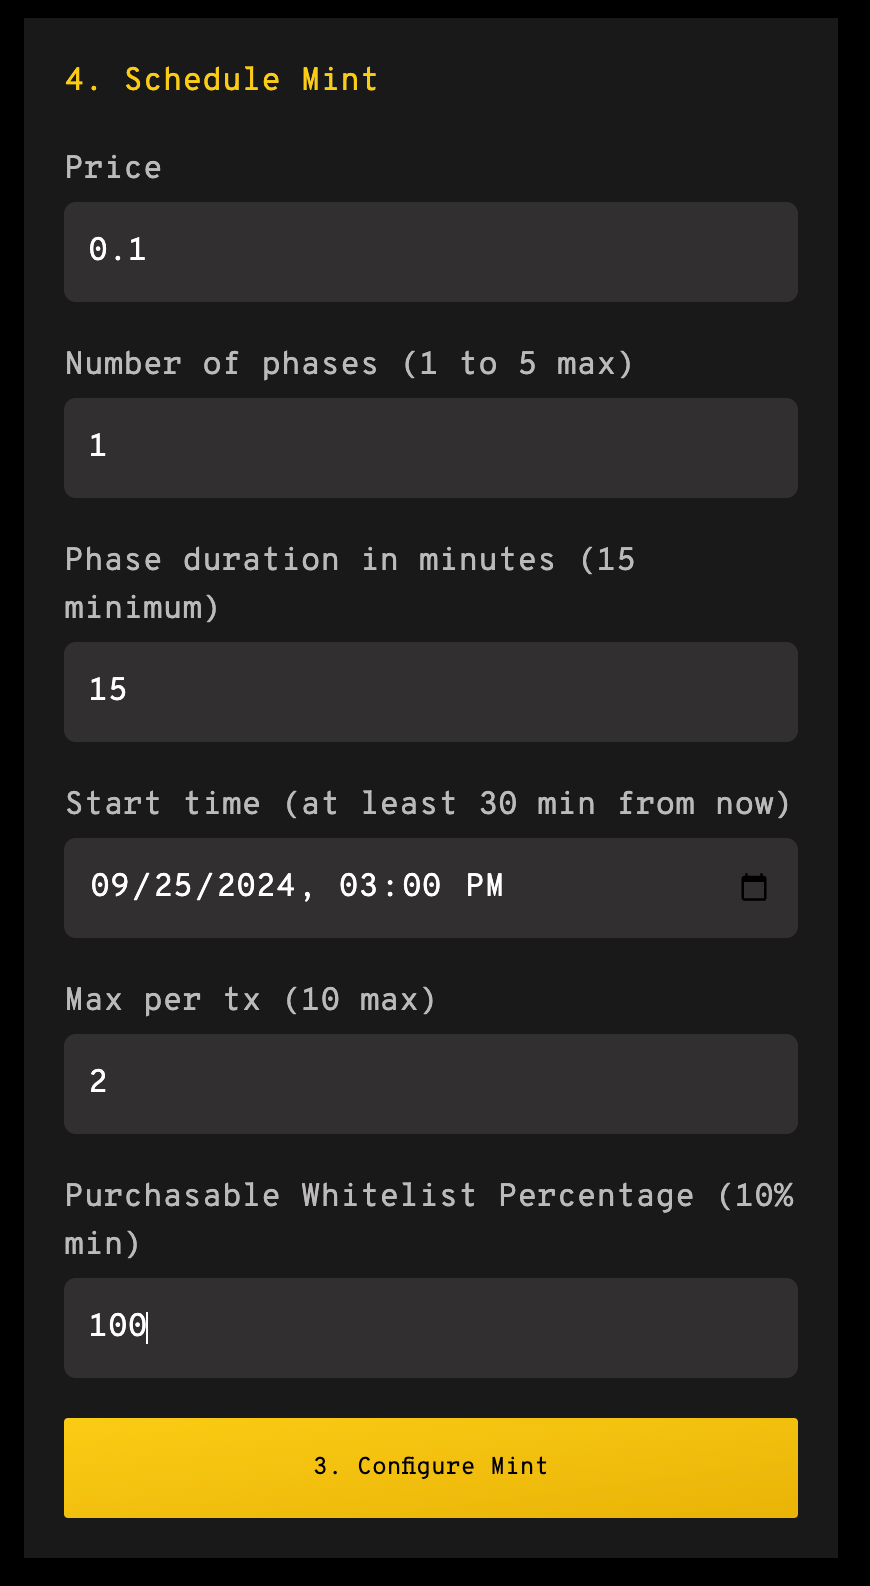
If you want to keep it simple, you can just enter all of the minimum values that are specified and not worry about it.
The phases essentially let you set up multiple whitelist phases.
Phase 1 WL spots = a guaranteed mint.
The rest allow for oversubscription.
These fields may be a bit more relevant for large collection / pfp mints, but still are useful.
The other thing that may be confusing is the "Purchasable Whitelist Percentage".
We reward Kingshit, Lucky, Majin, and Tech stakers (currently just these) with a token called Powder. Every mint has to have a minimum % of the phase 1 WL spots that are purchasable by burning POWDER.
If you have no opinions about this, just put 100 and you will incentivize POWDER holders to buy spots by burning their POWDER.
If you have an existing community you want to reward, you can put 10% (the minimum), and then manually add WL spots in another page.
The Mint
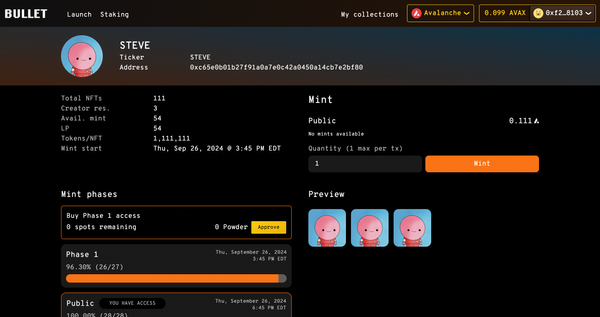
Once you've completed all of these steps, you should see your art on the Homepage of Bullet.
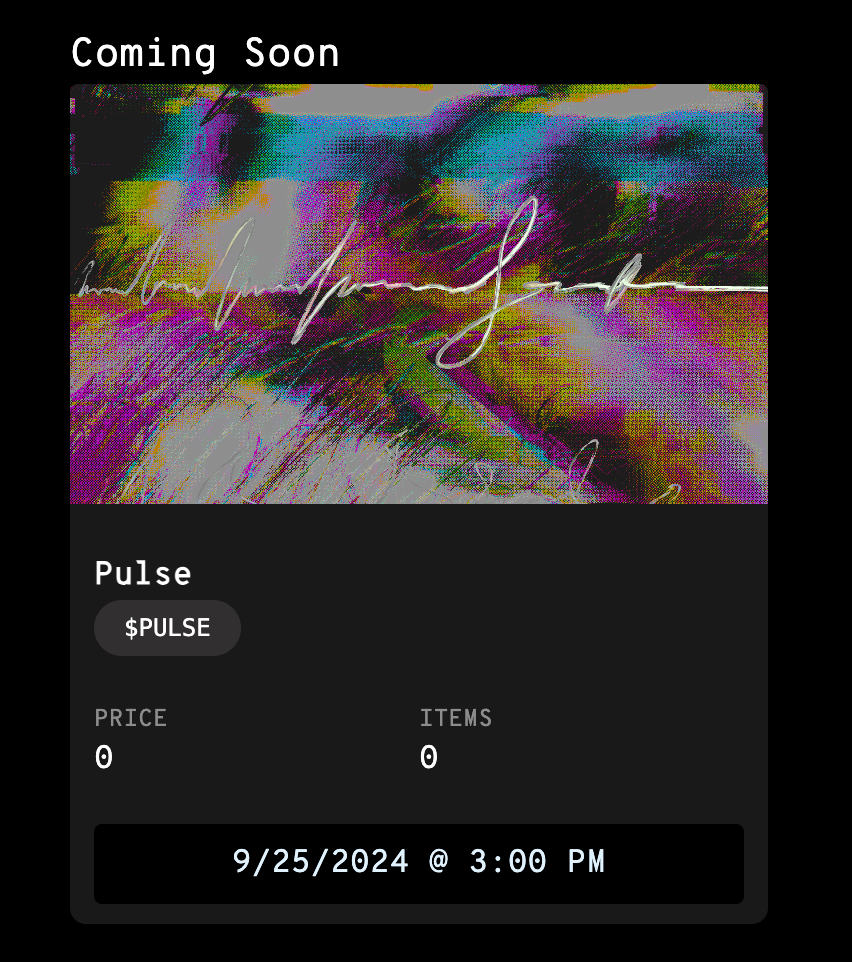
This will look a bit different very soon, but it should appear in the coming soon section.
Conclusion
This is very experimental territory at the moment.
If you've got questions, feel free to hit me (@0xMoonbags) up on X.
The UX should drastically upgrade on this soon. So far my challenge has just to get all of the pieces working smoothly 😅, and I think we're pretty much there.
Look forward to seeing what everyone creates!

